
Hi guys! Hard to believe week 3 of One Room Challenge is already here, but I am very excited as this was the week when something other than planning was happening! Scroll through this post to see our kitchen countertop install progress and a fabulous DIY bubble chandelier for under 60$. In case you missed our previous posts, here are links of Week 1 and Week 2 of ORC.
Kitchen area before and after countertop installation
So last week we did a lot of planning for the office kitchen space and I'm pleased to say that the kitchen countertop has been finally installed, and I am in love! There was a bit of miscommunication with the installers though, and the countertop came out a little bit different than it should have, but I've decided it still works pretty well overall and it would be a nonsense to stress about that. Also I've managed to take some 'before' pictures so you can finally meet the space we are working with.

In case you were wondering what a creative mess looks like.. As I said before, we used this space as a storage so a lot of props and basically anything that didn't have a place yet was here. Oh, and the wire basket in the corner will get a makeover and will stay here as a magazine stand or a decorative pot, haven't made the final decision yet!
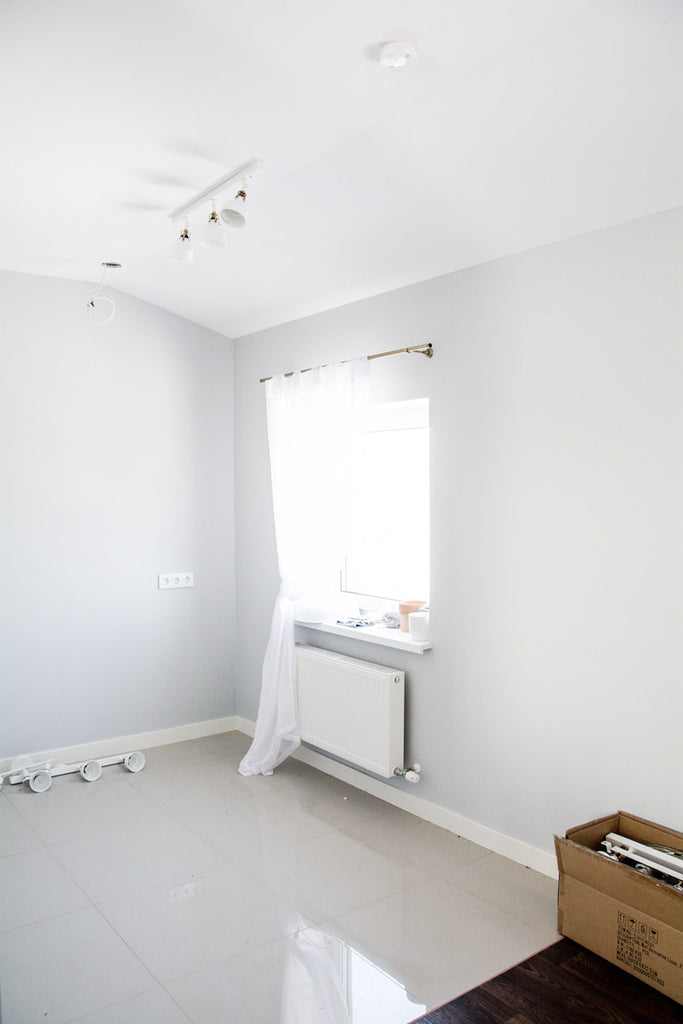
So this is the main kitchen area we are working with, cleaned up a little bit. As you can see the flooring is divided for the kitchen area and the rest of the studio and we are stuck with quite a basic looking radiators which I feel is a standard throughout Europe with these basic style renovations. I was quite sad about them first when we moved in as there was no logical way how to hide them as they are misaligned with the window sills and made me nuts for a while there. But as we are renting, I decided to focus on the styling of the rooms so they would simply not be so noticeable when you walk in the room.

And when you turn around, there is the dining area, right next to the second window. As you probably already guessed, we will be installing Marble wall mural on this wall and, hint, it will be included in one of our upcoming collections!
Our stunning dining table will go right underneath the bubble chandelier, and if you want to learn how it was made, scroll down for a DIY tutorial.

The curtains that we already have up are sheer linen like material & was such a bargain! I think I found them for 9$ each and loved them so much that I've installed them all over the studio to capture that home-like vibe. Also I feel they make the room a little bit more feminine, even in a very simple Scandinavian inspired interior. Oh, and the golden curtain holdbacks are actually napkin rings and fit together perfectly with the brass curtain rods!
To sum up the countertop story, here is a quick glance of the installation process.

To liven up the space I will add a super cute pink retro fridge, by the looks of it very similar to pink Smeg washing machine, actually. As we are on a budget and were looking for a tiny fridge to fit the needs of an office refrigerator of only 3 people, we came across this one at a local electronics store. Also, to continue the vintage vibe, the IKEA Domsjo sink & Glittran tap were my favourites - I simply love the look of a clean white farmhouse style sink in the kitchen!

Voila! It took the guy almost whole day to install, but I am very pleased of how this has come together! To envision the interior vibe & final look I like to set up the space with everyday knick-knacks, so pardon the half dead plant! Winter here in Latvia ended only a couple of weeks ago, and we've been struggling to keep our office plants alive during the long winter period. The air was very dry and most of the leaves simply dried out, regardless of the everyday care & water-spraying, so we ended up throwing most of them out.
I'm not quite sure what to do with the light outlet up there, as we really don't need additional lighting than what we already have, and I am not quite sure how to hide it aesthetically.. Any ideas would be much appreciated!
DIY Bubble chandelier

The last thing we managed to do is create this amazing bubble chandelier. I remember seeing it on Pinterest last year and thought that I need it. I wasn't sure where I would install something like this, up until now, but I think it couldn't have found a better place! I love that it is clear, so it let's the light through, which we don't have much during the winter anyway, and some of the bubbles have pearl-like finish, so they actually reflect light in different colors.

The ingredients, so to say, that you need are only few and rather inexpensive. First you need to find a cord set & bulb that you find appealing, these might even be the biggest expenses given the brand and style you choose. Secondly you will need a good fishing line that is quite strong to hold the ornaments but easy to work with so you wouldn't go nuts when tying all the knots around them. Last thing you need are the ornaments themselves. Here in Latvia these were available only in one store and the most perfect time to buy them? Right after Christmas! Because of the sale, you know.. Given all these circumstances the lamp cost us around 60$, and I feel it is definitely worth it - the assembling process took only an hour! And look, how pretty..
♡


How to get it done in only an hour? Take the ornament and tie a knot around the loop, then set aside while you work on the rest of them. Tip - work on a carpet or another place where the ornaments cannot break if they slip out of the hands. Once all of the ornaments are done, start tying them one by one around the cord. We did it chaotically and it came out rather uneven but very pretty with that wabi-sabi perfect imperfection look.
I will share the beautiful styled final look of this fabulous chandelier once the room is complete, meanwhile we have other exciting things to do to meet the deadline of ORC Week 6:
- [Kitchen cabinets & counter top installation + handles] - Done!
- IKEA cabinet upgrade + styling
- [Bubble chandelier DIY] - Done!
- Marble wall mural installation
- Dining area styling
- Planting
- Final decor pieces & room styling
- Big room reveal
Next week we're tackling Marble wallpaper install & some decor pieces, so maybe we'll feature a video of the process with you guys to get to know our self adhesive wallpaper even better! May we all have a productive week & talk soon!


